Upload Errors
"error: espcomm_open failed"
If you work with ESP32 or ESP8266 boards, regardless of the firmware you want to install, you will likely encounter this error sooner or later. The espcomm_open error is not a compiler error. It appears when you try to upload firmware, but esptool fails to establish a connection.
Besides espcomm_open, other common errors include espcomm_sync and Timed out waiting for packet header.
warning: espcomm_sync failed
error: espcomm_open failed
Failed to connect to ESP8266: Timed out waiting for packet header
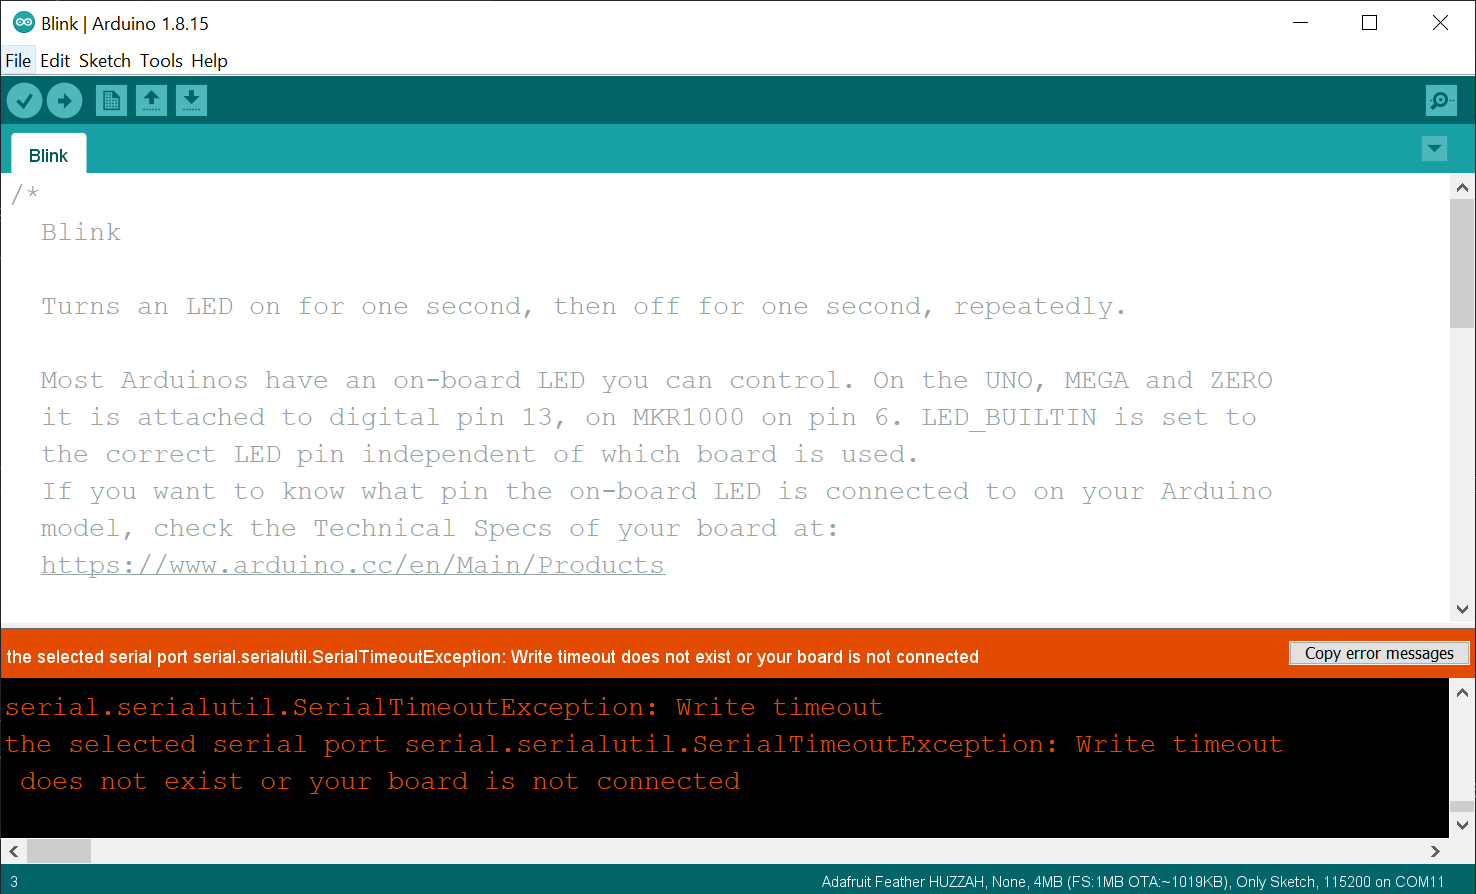
serial.serialutil.SerialTimeoutException: Write timeout
does not exist or your board is not connected
Error messages Esptool is a python script made for flashing the ESP32 or ESP8266. It can be used directly through the command line or indirectly through an IDE like Arduino.
If it fails to open a connection to your development board, check these things:
- Make sure to have the correct serial (COM) port selected
- Install missing drivers
- Try another USB cable (some only provide power and transfer no data)
- Try a different USB port and avoid USB hubs, dongles, or adapters
- Make sure the serial connection isn't already in use by another program
- Hold down the flash button or connect GPIO-0 (D3) to GND
- If everything fails, try it on another computer
Select the correct port
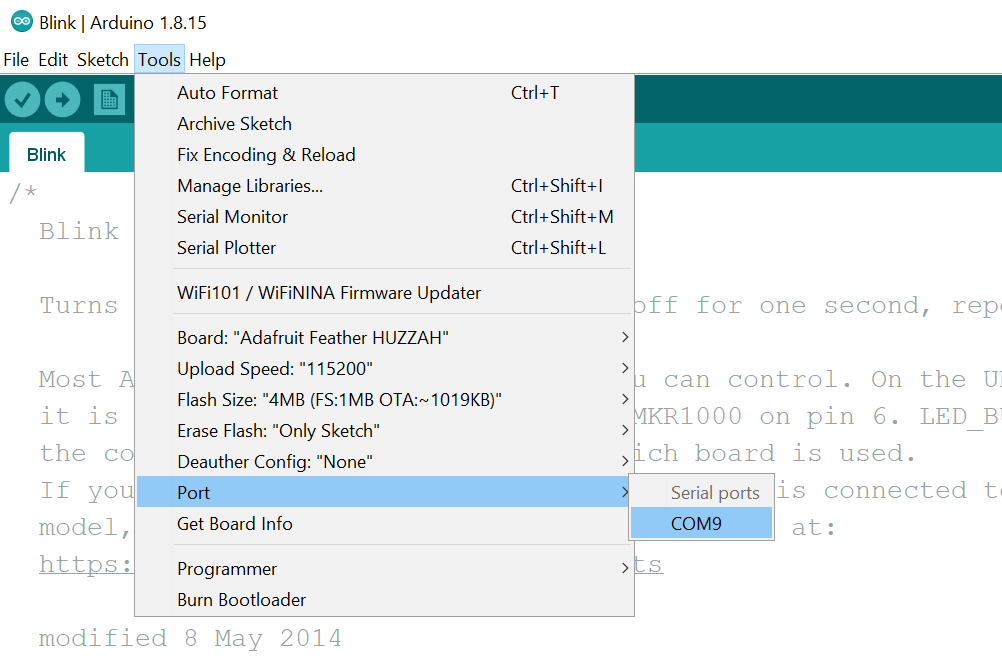
Before you can flash firmware onto a development board, you must select a serial port (COM port).
In Arduino IDE, you select it by going to Tools and then port.
To figure out which serial port corresponds to your dev board, look at the list (without your board plugged in), then plug in your dev board and observe which new serial port appeared in the list.
If you don't see a new port appear when you plug in your board, or the menu is grayed out completely, then no new serial port was detected.
This can be caused by a missing driver or a defective USB cable. Continue reading in this case.
Drivers
Bad news 😔: There are multiple drivers, and we can't tell you which one you need. It depends on the hardware you have.
Good news 😃: There are only 3 different families of serial chips used on almost all development boards. So worst case, you install all of them.
Below is a list of those chips with links to their manufacturer's drivers' download page. The pictures shown are examples. All these chip families exist in different sizes (packages) and can look different on your development board.
CH340 & CH341
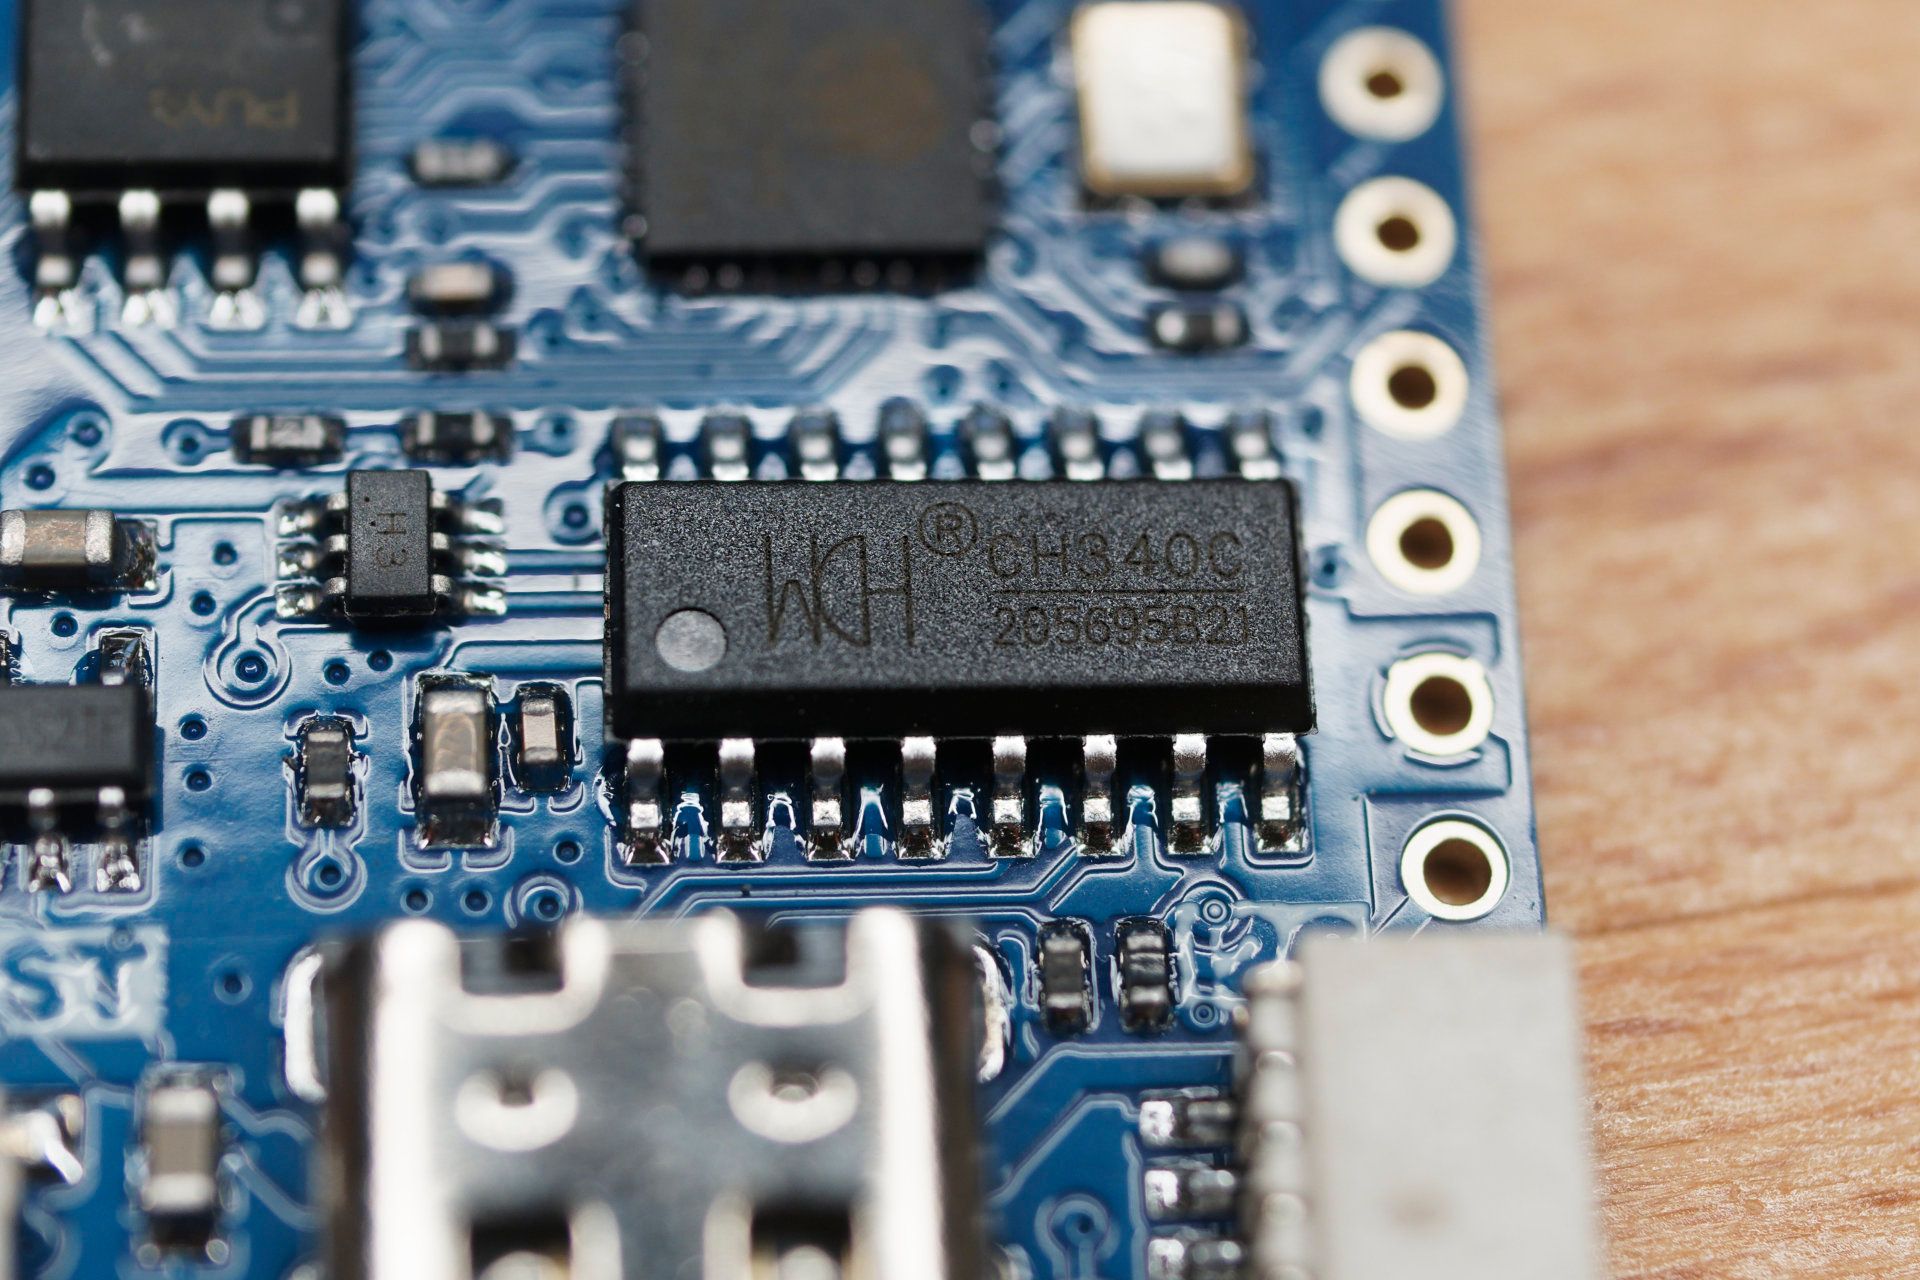
The CH340/CH341 is a very common USB to serial chip family, used often in cheap development boards thanks to its affordable pricing.
Download CH340/CH341 DriversCP210x
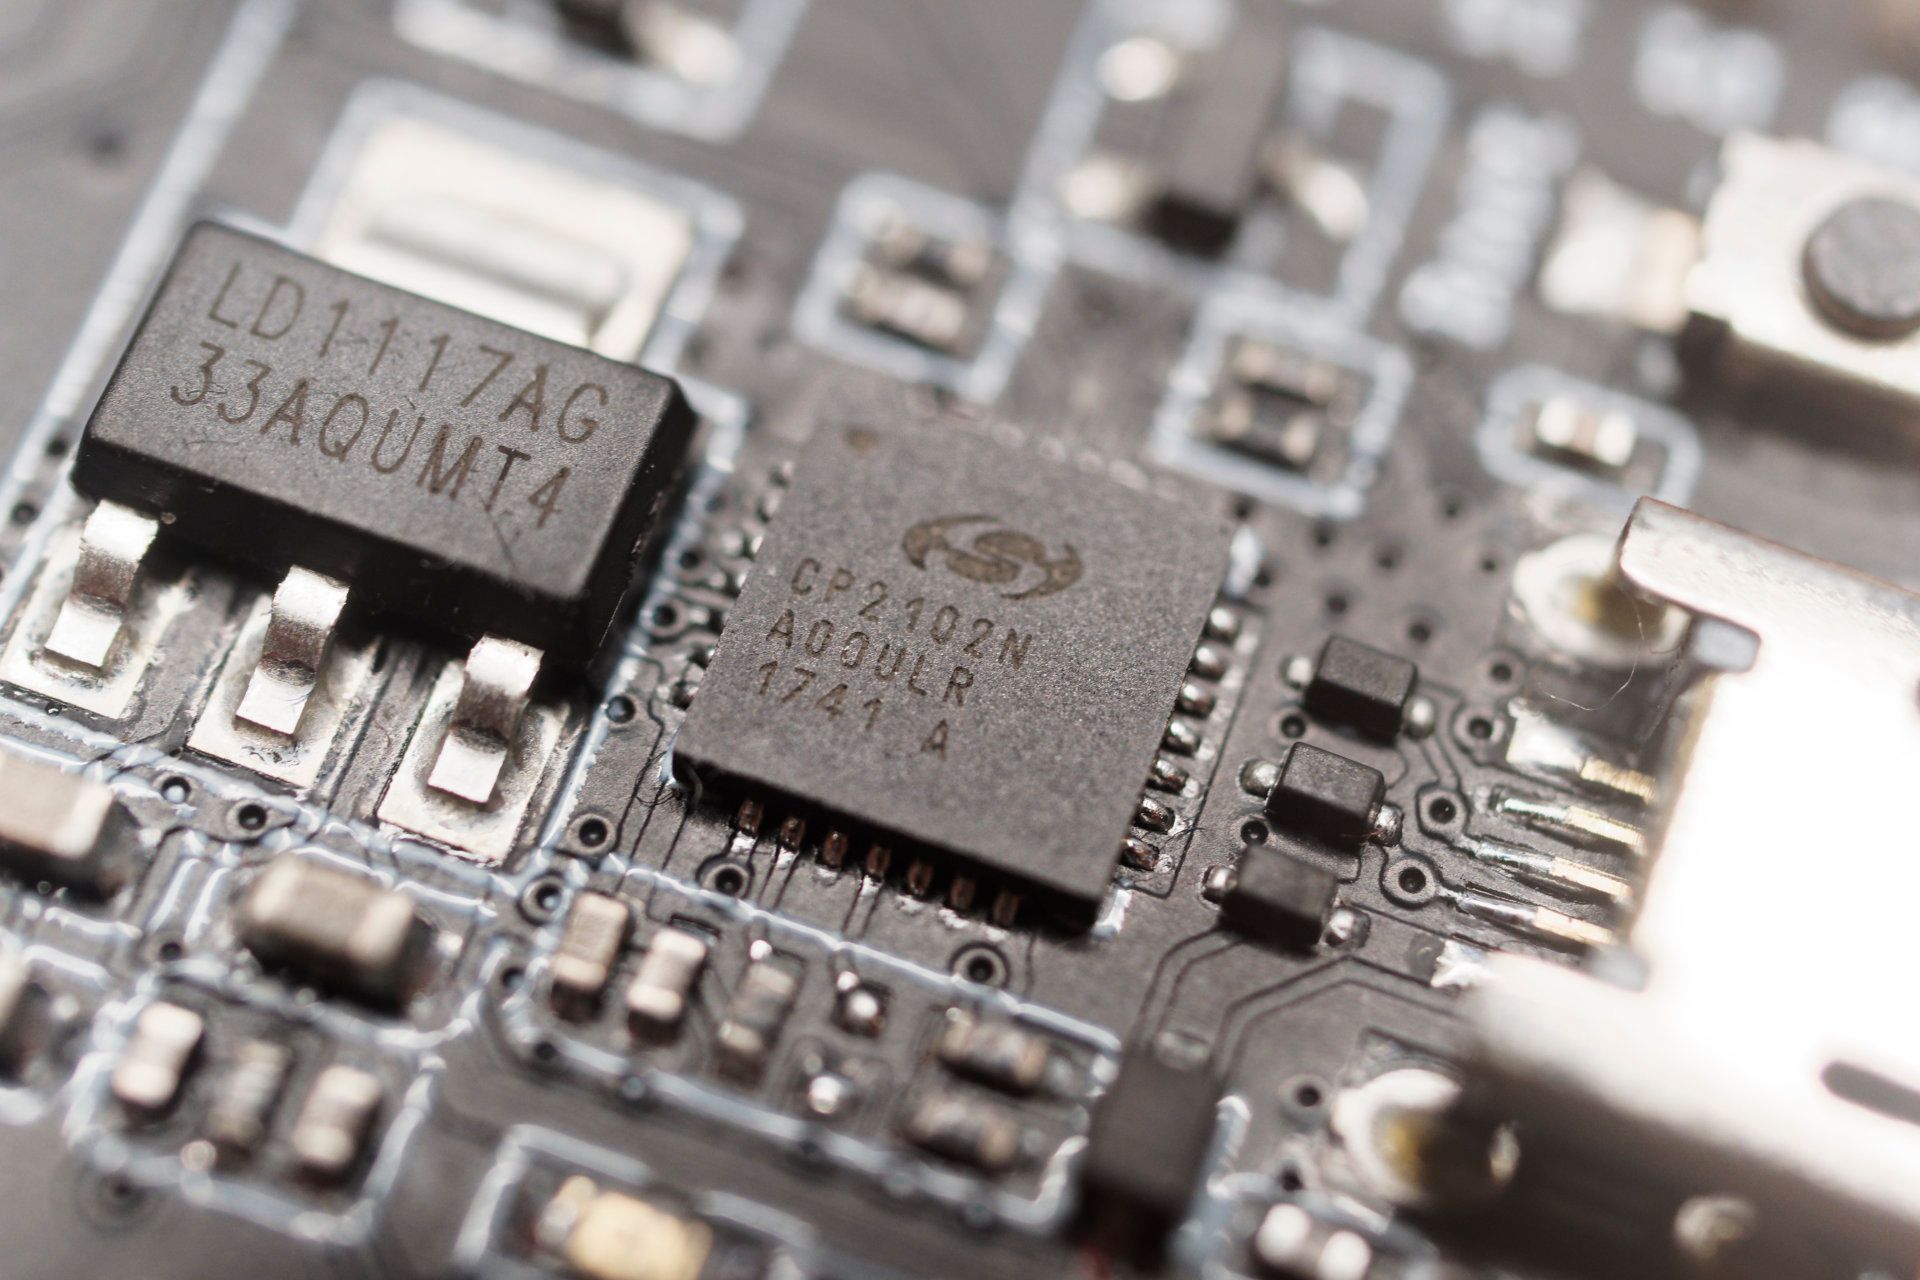
Due to their speed and small form factor, the CP2102 and CP2104 from Silicon Labs are popular among most development boards.
Download CP210x DriversFTDI
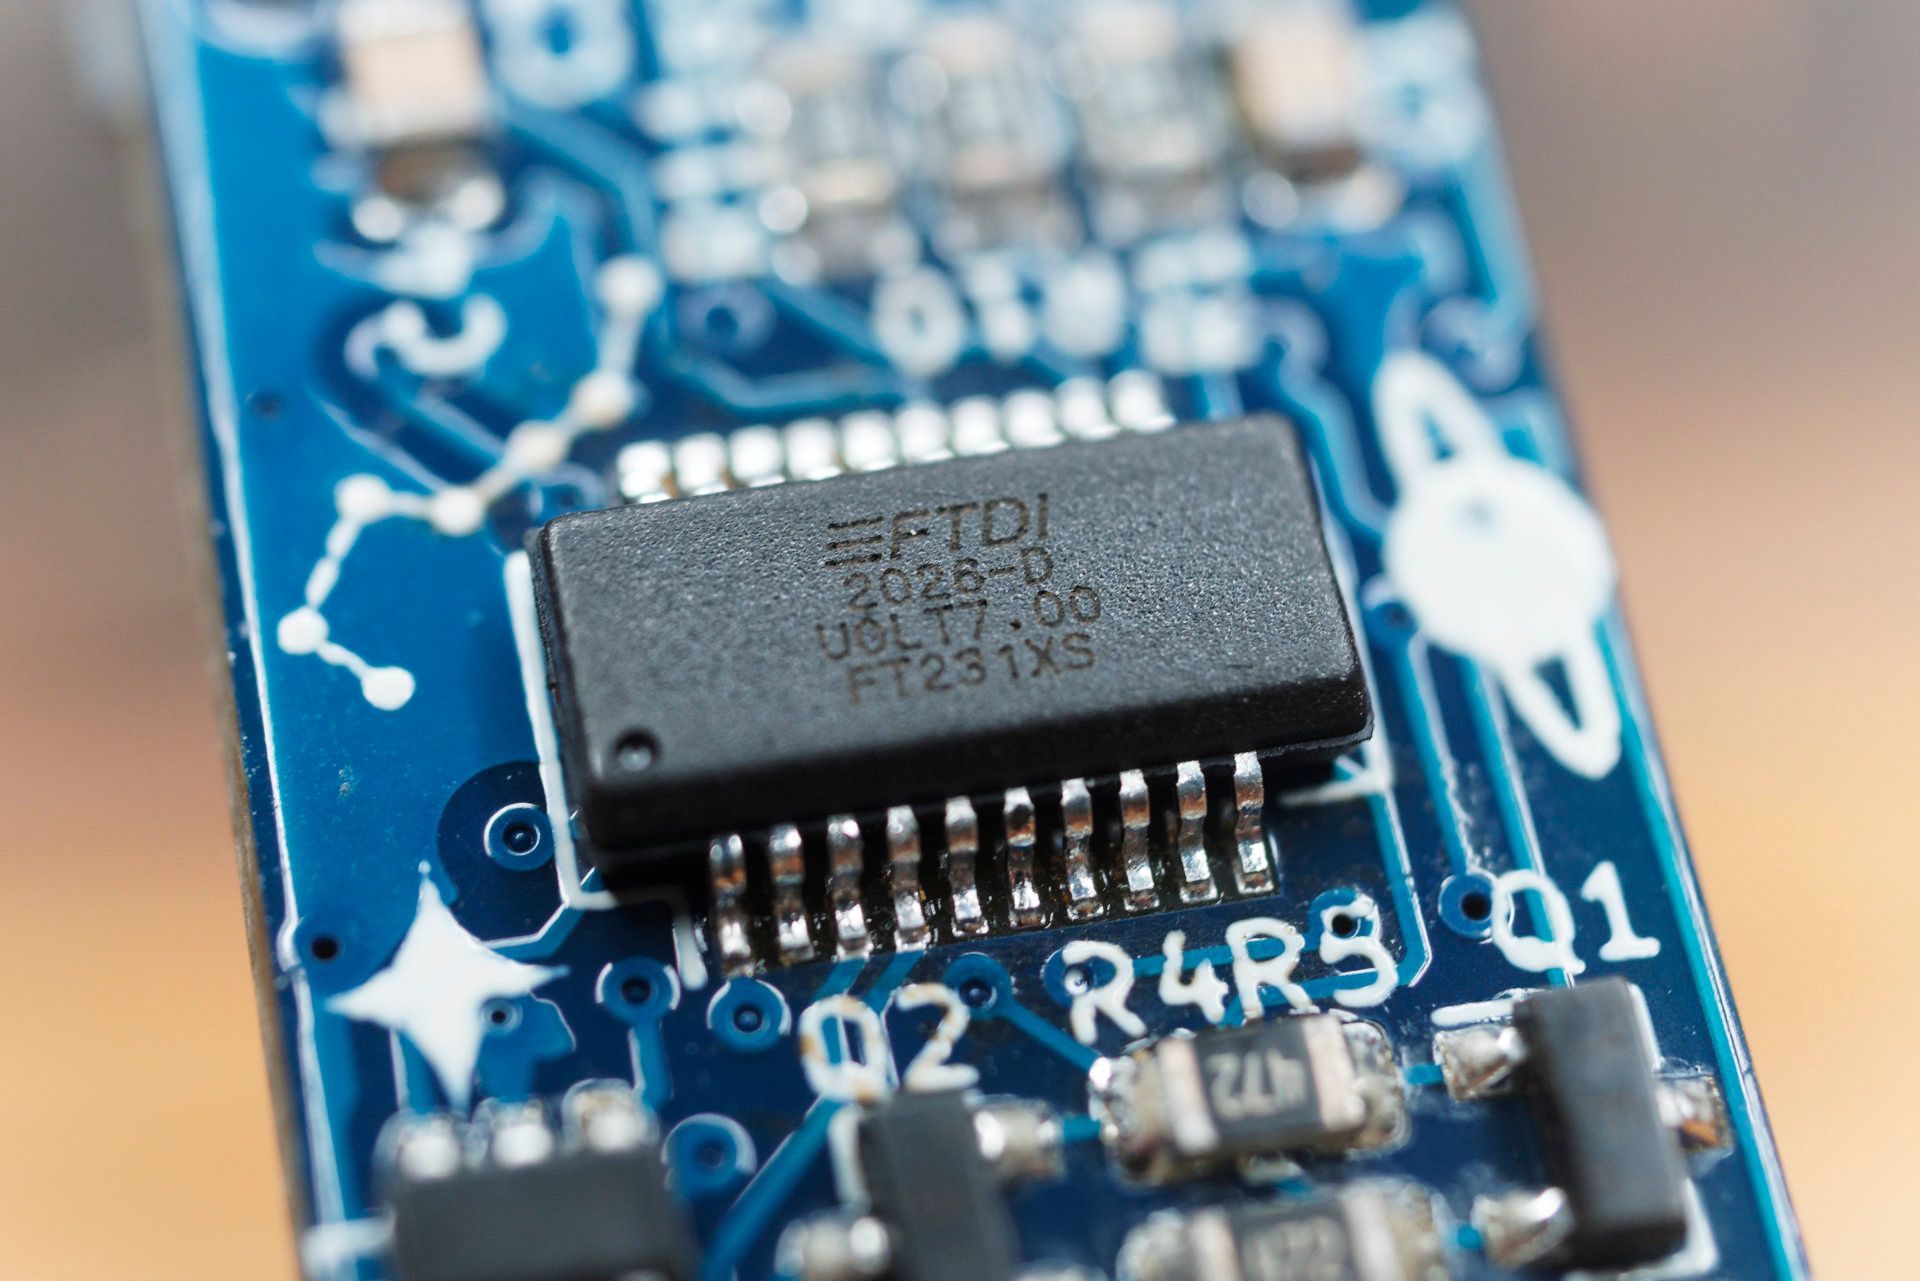
FTDI Chip makes Hi-Speed USB serial ICs. For example, we used an FTDI chip for our Andromeda board.
Download FTDI DriversThe USB connection
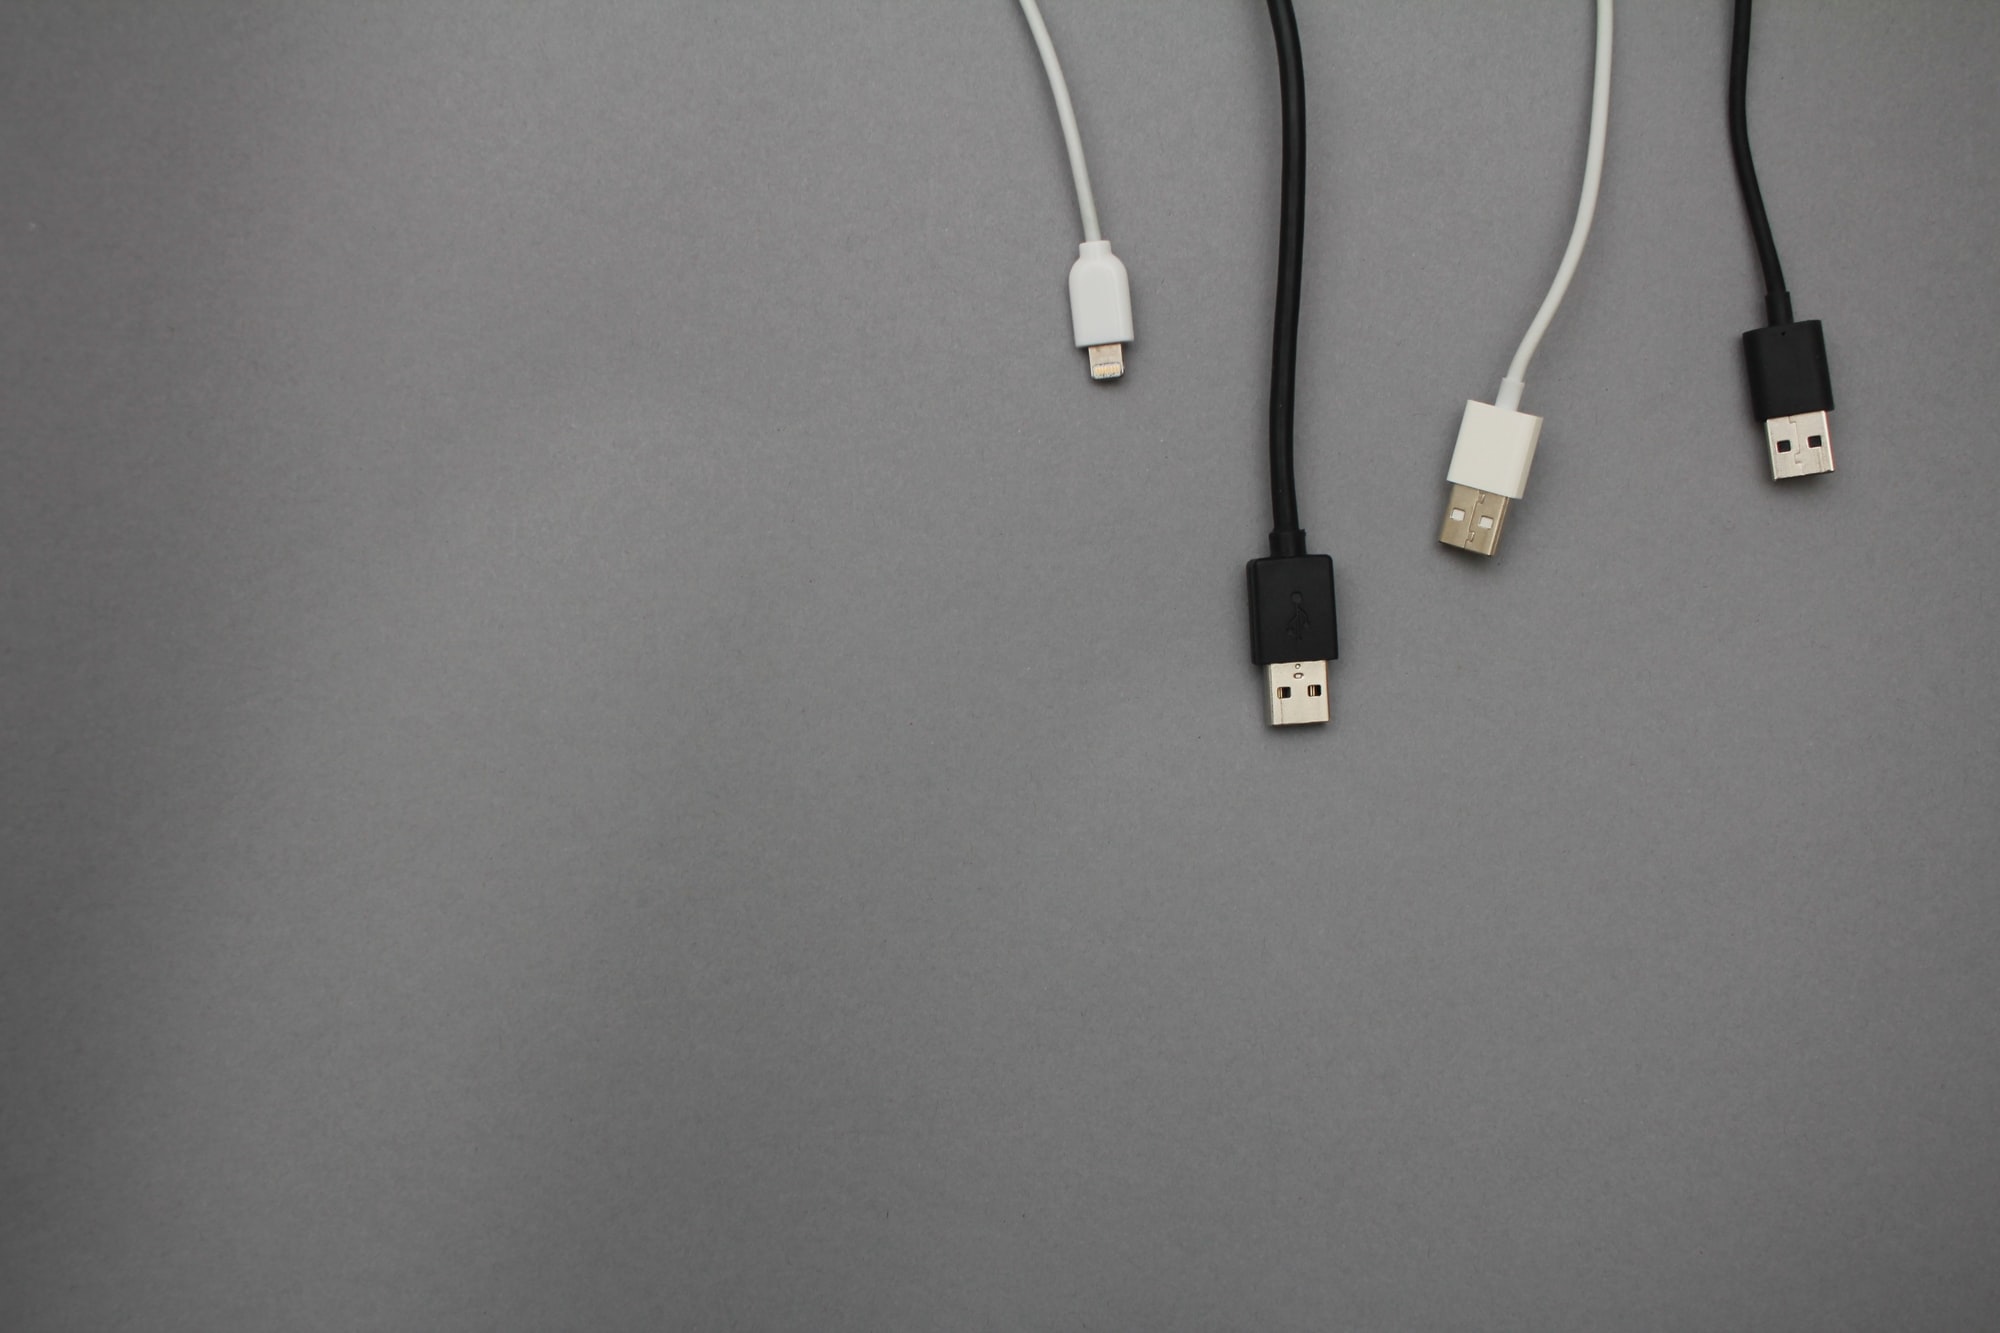
If you installed the drivers, but no new serial port is detected, it might be the cable itself. Some USB cables are made for charging only and can't transmit data. Try another cable.
Sometimes it can also be enough to use a different physical USB port.
Avoid USB hubs, dongles, or other adapters in between the connection that could cause problems.
Flash button
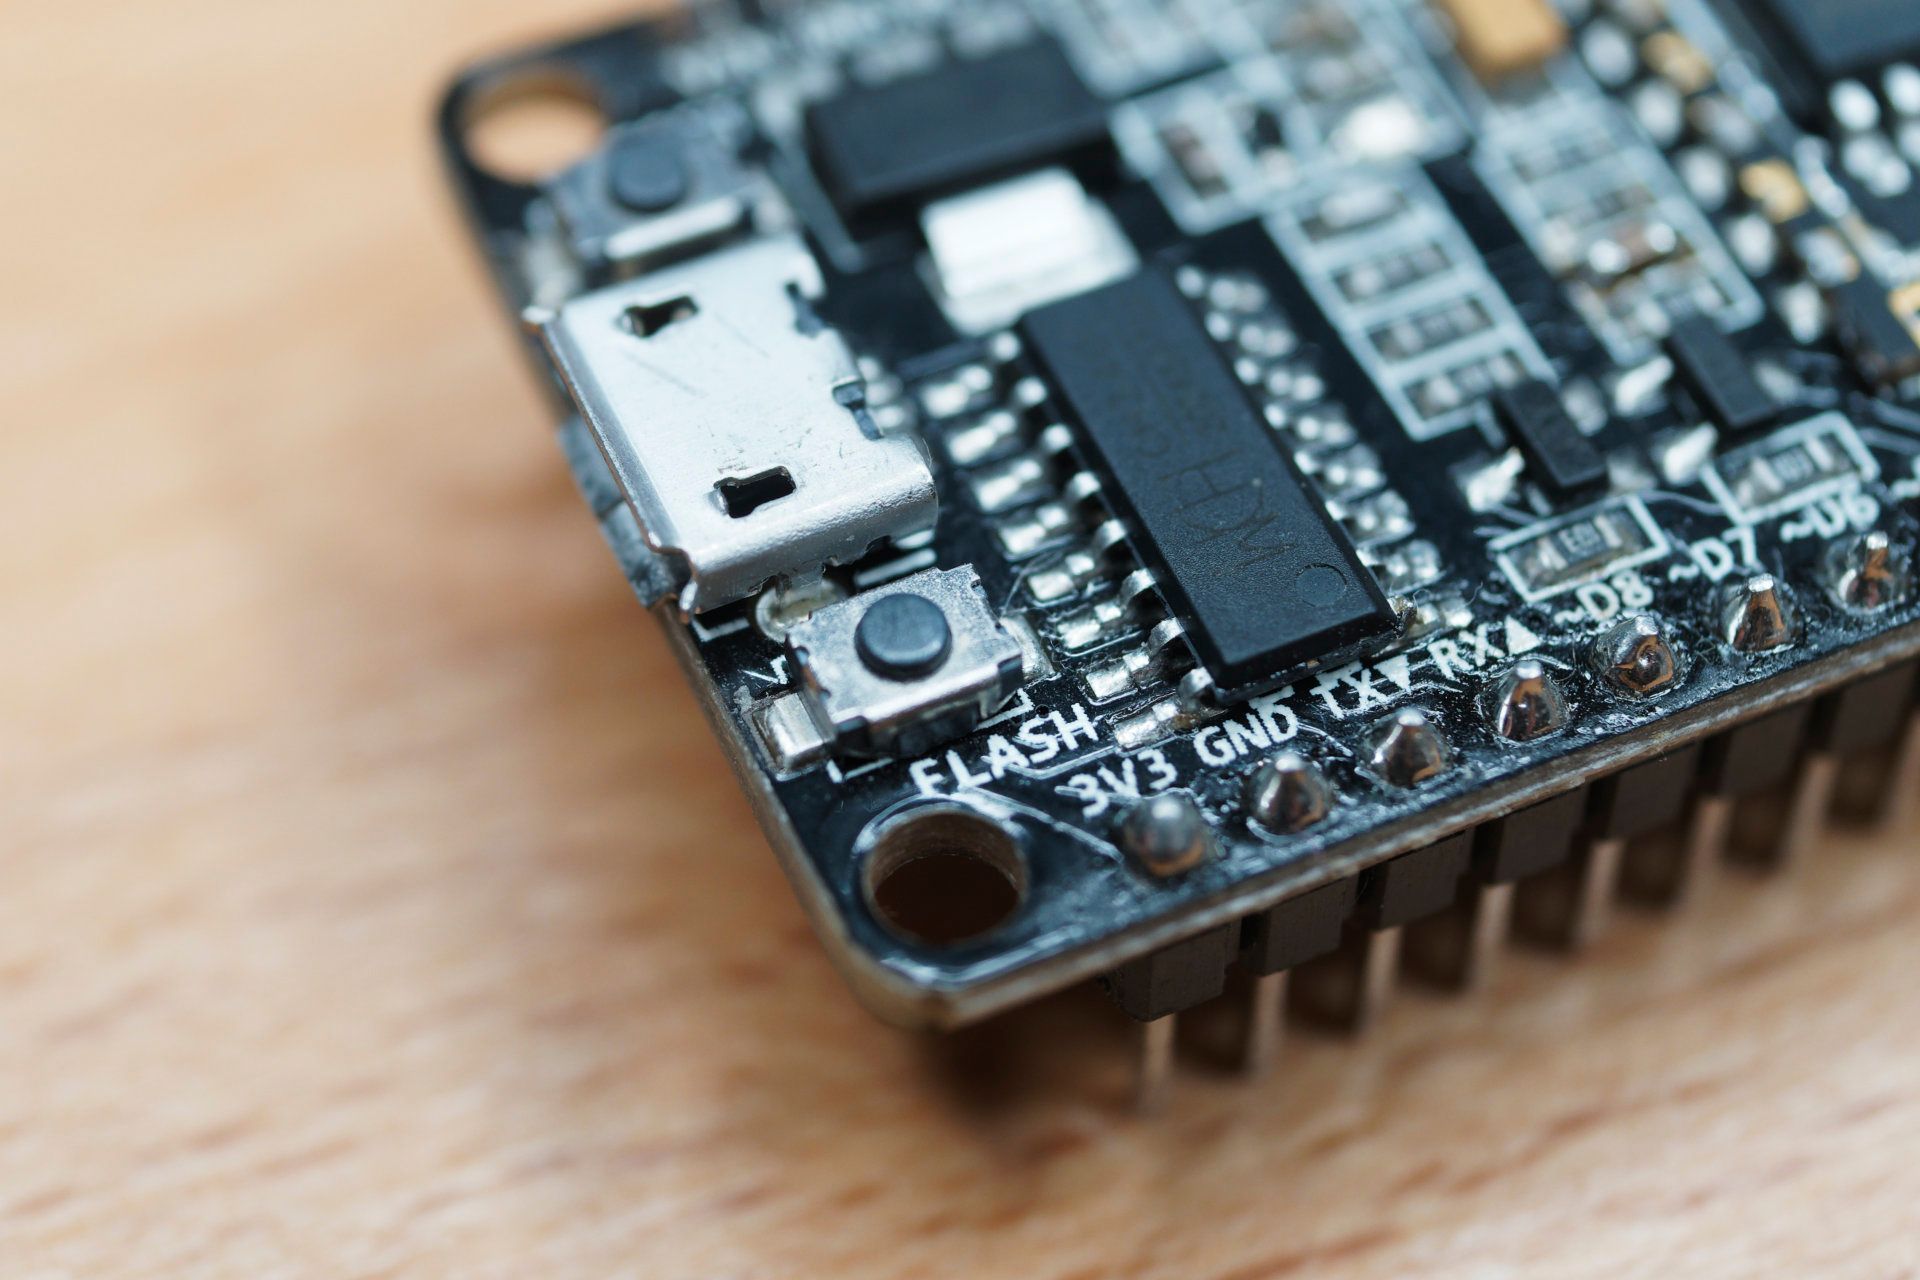
If your board is detected and you are sure to have selected the correct port, but uploading firmware still doesn't work, it might be because of the development board itself. The ESP has to be in flash mode to accept new firmware.
Most ESP32 and ESP8266 boards have an automatic reset and flash circuit. Meaning they can be restarted and put into flashing mode automatically. But sometimes, that circuit is defective or hasn't been implemented correctly.
To manually put the ESP32 or ESP8266 into flashing mode, you need to connect GPIO-0 (D3) to GND. Some boards have a dedicated button for that. Other boards don't - in which case you'd have to connect those 2 pins with a wire.
With the flash button pressed or GPIO-0 connected to GND, plug in your board or hit the reset button. Then start uploading the firmware. Sometimes, you need to keep the button pressed or the pins connected until the upload begins. This part is sometimes tricky and might require a bit of trial and error.
Then you must disconnect the pins and restart the board (unplug and plug it in again). It should then be back to the regular boot mode and run your newly flashed firmware.
What else?
Make sure no other software is using the serial port.
If nothing seems to work, try it on another computer.
Still no luck? If you have tried everything mentioned here, and nothing seems to work, then maybe the hardware has an issue. Unfortunately, this can happen, especially with cheap development boards. Try reaching out to the seller or manufacturer.